To add a navigation drawer, declare your user interface with a DrawerLayout object as the root view of your layout. Inside the DrawerLayout, add one view that contains the main content for the screen (your primary layout when the drawer is hidden) and another view that contains the contents of the navigation drawer.
<?xml version="1.0" encoding="utf-8"?>
<android.support.v4.widget.DrawerLayout
xmlns:android="http://schemas.android.com/apk/res/android"
android:id="@+id/drawerLayout"
android:layout_width ="match_parent"
android:layout_height="match_parent">
<!-- Content -->
<FrameLayout
android:id ="@+id/frameLayout"
android:layout_width ="match_parent"
android:layout_height="match_parent" />
<!-- Navigation drawer menu -->
<ListView
android:id="@+id/drawerListView"
android:layout_gravity="start"
android:choiceMode ="singleChoice"
android:layout_width ="240dp"
android:layout_height ="match_parent"
android:background ="?android:attr/windowBackground" />
</android.support.v4.widget.DrawerLayout>
The above layout uses a DrawerLayout with two child views: a FrameLayout to contain the main content which will be populated with a Fragment at runtime, and a ListView for the contents of the drawer.
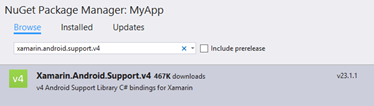
Now to the MainActivity.cs coding.. let’s get a reference to the drawerLayout = FindViewById<DrawerLayout>(Resource.Id.drawerLayout); You will find that DrawerLayout is not defined. You need to add a reference via Nuget to Android Support Library v4. Open Nuget and search for Xamarin.android.support.v4
Android Support Libraries : The Android Support Libraries are a set of code libraries that provide backward-compatible versions of Android framework APIs as well as features that are only available through the library APIs. Each Support Library is backward-compatible to a specific Android API level. This design means that your applications can use the libraries' features and still be compatible with devices running older versions of Android. Including the Support Libraries in your Android project is considered a best practice for application developers.
Adding a using statement for Android.Support.V4.Widget will complete the reference to DrawerLayout.
_menuItems = new string { "Welcome", "Options", "About" };
_drawerLayout = FindViewById<DrawerLayout>(Resource.Id.drawerLayout);
_drawerList = FindViewById<ListView>(Resource.Id.drawerListView);
_drawerList.Adapter = new ArrayAdapter<string>(this, Resource.Layout.ListViewMenuRow, Resource.Id.menuRowTextView, _menuItems);
We have a List which should be populated by an Adapter (ArrayAdapter or SimplerCursorAdaptor)
At this point we have (left) and if you swipe toward the right you see the menu.

Hooking up the menu click looks like..
_drawerList.ItemClick += _drawerList_ItemClick;
private void _drawerList_ItemClick(object sender, AdapterView.ItemClickEventArgs e)
{
OnMenuItemClick(e.Position);
}private void OnMenuItemClick(int position)
{
this.Title = _menuItemsposition;
}
If you want to use lambda the above can be rewritten..
_drawerList.ItemClick += (object sender, AdapterView.ItemClickEventArgs e) => OnMenuItemClick(e.Position);
private void OnMenuItemClick(int position)
{
this.Title = _menuItemsposition;
}
Now we have to deal with showing a view after clicking a menu item. We will do this implementation with Fragments. A Fragment is a piece of an application's user interface or behavior that can be placed in an Activity. Interaction with fragments is done through FragmentManager, which can be obtained via Activity.getFragmentManager() and Fragment.getFragmentManager()
At this point, we declare field parameter Fragment _fragments
private Fragment _fragments = new Fragment{ new WelcomeFragment(), new OptionsFragment(), new AboutFragment() };
and within the menu click, use the FragmentManager to set the selected fragment using the position in the array.
private void OnMenuItemClick(int position)
{
base.FragmentManager.BeginTransaction().Replace(Resource.Id.frameLayout, _fragmentsposition).Commit();
this.Title = _menuItemsposition;
}
Ok, so running the sample now we have a drawer menu, and when an item is selected we use FragmentManager to swap out the frameLayout view with a fragment defined in the _fragments array. As the application starts we want to set the first menu item selected and we want to show the respective fragment via
_drawerList.SetItemChecked(0, true); //highlight the first item at startup
OnMenuItemClick(0);
After the menu item is selected, we swap fragments and we will also close the drawer via
_drawerLayout.CloseDrawer(_drawerList);
If you review the screen captures above you will notice we do not yet have the hamburger menu. We will do this by working with the ActionBar. Using the class ActionBarDrawerToggle we can tie together the functionality of DrawerLayout and the framework ActionBar to implement the recommended design for navigation drawers.
So, I did have a few conflicts at this point which brings up Android.Support.V7.App vs. Android.Support.V4.App. What is the difference? V4 supports library is designed to be used with Android 1.6 (API level 4) while V7 supports “libraries designed to be used with Android 2.1 (API level 7) and higher” We will need to add via Nuget Xamarin.Android.Support.v7.AppCompat to reference ActionBarDrawerToggle. i.e. Android.Support.V7.App.ActionBarDrawerToggle
Within v7 Support Library there are several libraries with a number of feature sets which can be included independently of each other. For example within v7 we have v7 appcompat library, v7 cardview library, v7 gridlayout library etc.
//create an instance of actionbardrawertoggle
_drawerToggle = new ActionBarDrawerToggle(this, _drawerLayout, Resource.String.DrawerOpenDescription, Resource.String.DrawerCloseDescription);
//set the actiondrawertoggle as the drawerlistener on the drawlayout so it recieves drawer state-change callbacks
_drawerLayout.SetDrawerListener(_drawerToggle);
//Must up-enable the home button, the ActionBarDrawerToggle will change the icon to the "hamburger"
ActionBar.SetDisplayHomeAsUpEnabled(true);
Building the project I do have an issue….”No resource identifier found for attribute ‘touchscreenBlocksFocus’ in the package ‘android’ After more than 1 hour of searching I came along the solution. I had ‘Compile using Android version:’ API Level 19, Minimum Android to target: Use Compile using SDK Version, Target Android: ‘'Use Compile Using SDK Version. In order to avoid this error I had to change my Target Android version to API Level 21 (Xamarin.Android v5.0 Support).
So that brings up the question/concern, for Android applications you have the choices Compile Using, Minimum Android to target, and Target Android version. So what is the difference here. From StackOverflow a very good explanation (partial)
”In short, here is the purpose to declaring a different targetSDK from the minSDK: It means you are using features from a higher level SDK than your minimum, but you have ensured backwards compatibility. In other words, imagine that you want to use a feature that was only recently introduced, but that isn't critical to your application. You would then set the targetSDK to the version where this new feature was introduced and the minimum to something lower so that everyone could still use your app.”
Getting back on track, we were hooking up the action bar to that of the drawer. Before we hook up this action bar drawer toggle we have this (left) notice there is no icon. After we hook up the drawertoggle we have the < icon.


Now when a user clicks on the > icon we want to forward all actionbar clicks to the ActionBarDrawerToggle. We can do this with
public override bool OnOptionsItemSelected(IMenuItem item)
{
// Forward all ActionBar-clicks to the ActionBarDrawerToggle.
// It will verify the click was on the "Home" button (i.e. the button at the left edge of the ActionBar).
// If so, it will toggle the state of the drawer. It will then return "true" so you know you do not need to do any more processing.
if (_drawerToggle.OnOptionsItemSelected(item))
return true;
// Other cases go here for other buttons in the ActionBar.
// This sample app has no other buttons. This code is a placeholder to show what would be needed if there were other buttons.
switch (item.ItemId)
{
default: break;
} return base.OnOptionsItemSelected(item);
}
The final piece of this is ensuring that the hamburger is shown when the menu is closed. In order to do this we need to sync the state of the drawer via the following method. This will execute after your activities initialization is finished. You need to tell the toggle button to synchronize its icon with the open/closed state of the drawer.
protected override void OnPostCreate(Bundle savedInstanceState)
{
// Initialization and any needed Restore operation are now complete.
// Sync the state of the ActionBarDrawerToggle to the drawer (i.e. show the "hamburger" if the drawer is closed or an arrow if it is open).
_drawerToggle.SyncState();
base.OnPostCreate(savedInstanceState);
}
If you would like the sample code, please connect with me via email or twitter and I will send to you.