Tech Blog
Since 2004
Xamarin Android - ListViews Part 2 of 2

- February 1, 2016
Rest of the Story:
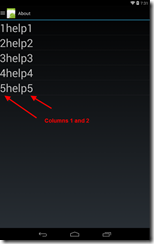
Continuing on from an older post, we will modify our listview to display 2 columns. Ultimately, we will put an image in the left column and text in the right column. Currently we have created an ArrayAdapter which takes a list/collection of strings and displays each row in a template. The template was defined in a layout TextViewItem.axml
<?xml version="1.0" encoding="utf-8"?>
<TextView xmlns:android="http://schemas.android.com/apk/res/android"
    android:id="@+id/textItem"
    android:textSize="44sp"
    android:layout_width="fill_parent"
    android:layout_height="wrap_content" />
What we have was an ArrayAdapter which required the above row definition with a collection of strings. This worked fine to display the ToString() of either the string collection you provided or the object collection you used in the definition.
Moving forward this post will use a more advanced row template to display a string or an object collection. This ultimately gives us more flexibility. To do this we will create a custom Adapter which manages the displays aspect of the listview. By doing this we can provide a collection of objects and then through our custom adapter we can position each property within our new row template. Our new row template TextViewItem2.axml will be defined by the following.
<?xml version="1.0" encoding="utf-8"?>
<LinearLayout xmlns:android="http://schemas.android.com/apk/res/android"
    android:orientation="vertical"
    android:layout_width="match_parent"
    android:layout_height="match_parent"
    android:minWidth="25px"
    android:minHeight="25px">
    <LinearLayout
        android:orientation="horizontal"
        android:minWidth="25px"
        android:minHeight="25px"
        android:layout_width="match_parent"
        android:layout_height="wrap_content"
        android:id="@+id/linearLayout1">
        <TextView
            android:id="@+id/textItem1"
            android:textSize="44sp"
            android:layout_width="wrap_content"
            android:layout_height="fill_parent" />
        <TextView
            android:id="@+id/textItem2"
            android:textSize="44sp"
            android:layout_width="wrap_content"
            android:layout_height="fill_parent" />
    </LinearLayout>
</LinearLayout>
Here you can see we have a LinearLayout parent and a LinearLayout (horizontal orientation) established to display 2 textviews side by side.
Now to the adapter, as mentioned above we have to build out a custom adapter as this adapter will be responsible for take each item in our collection and mapping our object properties to specific controls in the above textviewitem template.
   public class AboutScreenAdapter : BaseAdapter<MyDetail>
    {
        List<MyDetail> _items;
        Activity _context;
        public AboutScreenAdapter(Activity context, List<MyDetail> items) : base()
        {
            this._context = context;
            this._items = items;
        }
        public override long GetItemId(int position)
        {
            return position;
        }
        public override MyDetail this[int position]
        {
            get { return _items[position]; }
        }

        public override int Count
        {
            get { return _items.Count; }
        }
        public override View GetView(int position, View convertView, ViewGroup parent)
        {
            View view = convertView; // re-use an existing view, if one is available
            if (view == null) // otherwise create a new one
                view = _context.LayoutInflater.Inflate(Resource.Layout.TextViewItem2, null);

            //view.FindViewById<TextView>(Android.Resource.Id.text).Text = items[position];

            view.FindViewById<TextView>(Resource.Id.textItem1).Text = _items[position].Image;
            view.FindViewById<TextView>(Resource.Id.textItem2).Text = _items[position].Detail;
            return view;
        }
    }
Above you can see, we provide our object collection List<MyDetail> items and the row template is defined (bold) TextViewItem2 which is established by a layout in our layouts folder TextViewItem2.axml
